Brian Dempsey (bjd86), Katarina Martucci (kmm398), Liam Patterson (lgp36)
We created our own version of Guitar Hero which can play any song that has a MIDI file by using our custom controller and UI. We are big fans of the original Guitar Hero game, but felt limited by its inability to only play a set of songs. We came up with the solution, Guitar Hero MMMMDCCLX (4760 in Roman numerals). By using MIDI files, a way to process songs through keeping track of frequencies and timing, we were able to create a game that can play any song as long as we pre-process its MIDI file.
Much of our design is based on the original Guitar Hero game, but because we do not directly use any code, artwork, or sound from the game, we did not infringe upon any rights that the game has. Our game therefore complies with IEEE standards as we are not reproducing this game we are simply making our own version for fun.
We knew that we did not want to hard code a set of songs into our game, so we decided to use MIDI files which we have been told have never been used in this class before. We can process a MIDI file into notes that our game can play, so that anyone playing our game can give us a file they want to play. We would have to code in a set of songs for our demo, of course, but if someone wanted to they would indeed be able to play any song they wanted. The MIDI files use no background math, which saves us CPU time.
We needed a way to synthesize the notes being played. At first we considered using Karplus-Strong string synthesis to create the sound, which would sound close to a real instrument. This would require a lot of dynamic calculations though, so we decided to use Direct Digital Synthesis instead. Although this is a tradeoff for the sound quality, we do save memory space and CPU time. In fact, we are only using about 4 kB per song with this method so we could store around 32 songs in flash memory (we have 128 kB).
One other challenge we needed to overcome was how to time the notes on the screen. We considered saving the time of each note and what time it appeared on the screen, but did not have time to complete the overall timing aspect in the end. Instead, we found a modified solution described in the Note Timing section. This was not a trade off for the GUI, as the notes still fell on time, but it was a trade off for the sound as the timing of all of our songs are currently the same.
We used Python to translate the MIDI files into a format that our program could read. MIDI (Musical Instrument Digital Interface) files are used to store song information encoded into 2 byte lines where each line can take the form of different messages telling the system how to behave. For our purposes, we only looked at the note on and note off messages because these contain the note number which we use to produce the corresponding sound from the game, and play the note on screen in the correct column. The note numbers go from 0 to 127 so by modding each number by 12 (the number of keys per octave), we could sort the notes into 5 bins to determine which color note the note should be in the game. We print the original note number and the modded note number in the following format to a .txt file that we directly cut and paste into our songs header file:
First, we needed an array of frequencies to use for the Direct Digital Synthesis. We use frequencies that a piano plays to create an array to choose from for playing our songs. This, along with our song array are stored in a separate header file called sounds.h. At first, we wanted each song to have a separate array to choose from, however in using C we were not able to switch between the arrays appropriately. Instead, we had to combine all the songs into one array and keep track of their starting and ending points. Depending on which song the user selects, we start indexing at that certain part in the master songs array.
We use Direct Digital Synthesis (DDS) to create the music for the game. For DDS, we create a digital sine wave and then use the Digital to Analog Converter (DAC) to convert this to an analog output as sound from the speaker. To achieve this, we have a phase accumulator which is increased by one every time an Interrupt Service Routine is called. We set up Timer 2 to trigger this ISR at 50kHz. Within the ISR, we are able to produce the sound. On each call of the ISR, we set the DAC data output to be the sine table indexed at the phase accumulator values shifted by 24. We shift by 24 so that the phase accumulator value is on the scale of 0 to 256. After this, we add 2048 to this value so that the values we output to the DAC range from 0 to 4096, then OR with the DAC control bits. Finally, we send this out over the SPI to the DAC.
We had a few buttons that required debouncing. Debouncing is a way to make sure that the user actually pressed a button, and to make sure that multiple signals indicating a “press” only appear as a single long press in our program. Debouncing uses a switch statement with different states that indicate whether a button has been pressed, held down, or not pressed. We followed the pseudocode for debouncing provided by Professor Bruce Land on the course website. For each of the five note buttons and each of the limit switches, we have separate threads to keep track of their switch statements for if the button has been pressed. If a fret button is pressed, the corresponding circle at the bottom lights up with that color to indicate to the user that the button has been pressed. If a limit switch has been pressed, this sets a variable and allows the user to earn points if they are also pressing the correct fret.
Each note is separated by 200 ms in our implementation. This is controlled by using a PT_YIELD_TIME_msec(200 - (PT_GET_TIME() - (start time of the thread))) allowing each note to be very close to 200 ms apart. Even though the MIDI files contain timing information in them, we did not have time to implement this into our code. 200 ms is used because it produces music at approximately the right BPM for Sweet Child of Mine to sound correct, which was the original song we had running. In the future, we hope to integrate the timing information from the MIDI files to make each song sound more realistic. This would be pretty simple after we process the MIDI files to extract the timing information because we would simply replace the 200 in the yield time expression with the correct time each note should be played for.
To earn points, the user must be holding down the correct colored note while either strumming either up or down, all at the correct timing. The correct timing is when any part of the falling note is within the correct area at the bottom of the screen. To achieve this, we go through each row in our notes array to see if the correct button is being pressed while the falling note is within range of the circle at the bottom of the screen. The value of strumming up or strumming down must be true also. If the user is correct, the points increase by one and update at the top of the screen.
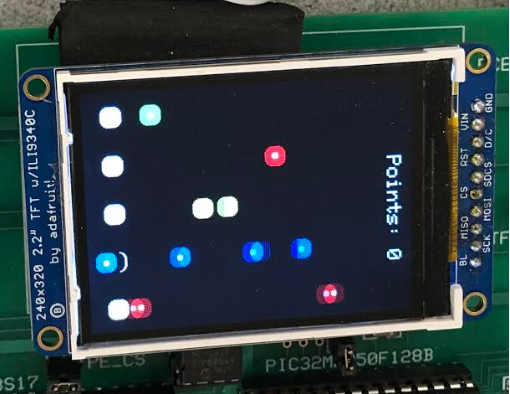
We ran our GUI on 15 frames per second. We were able to get limited flickering with this frame rate. At first our circles for notes were larger than they currently are, but this caused some significant flickering. This is why we reduced the circle sizes to their current state, which you can see in this picture of the game play:
Figure 1: Game Play
It was somewhat difficult to get a good image of Figure 1, as you can see some lag in the image. We added white dots in the center of each note to make it easier for the user to track whether or not they pressed the fret at the correct spot.
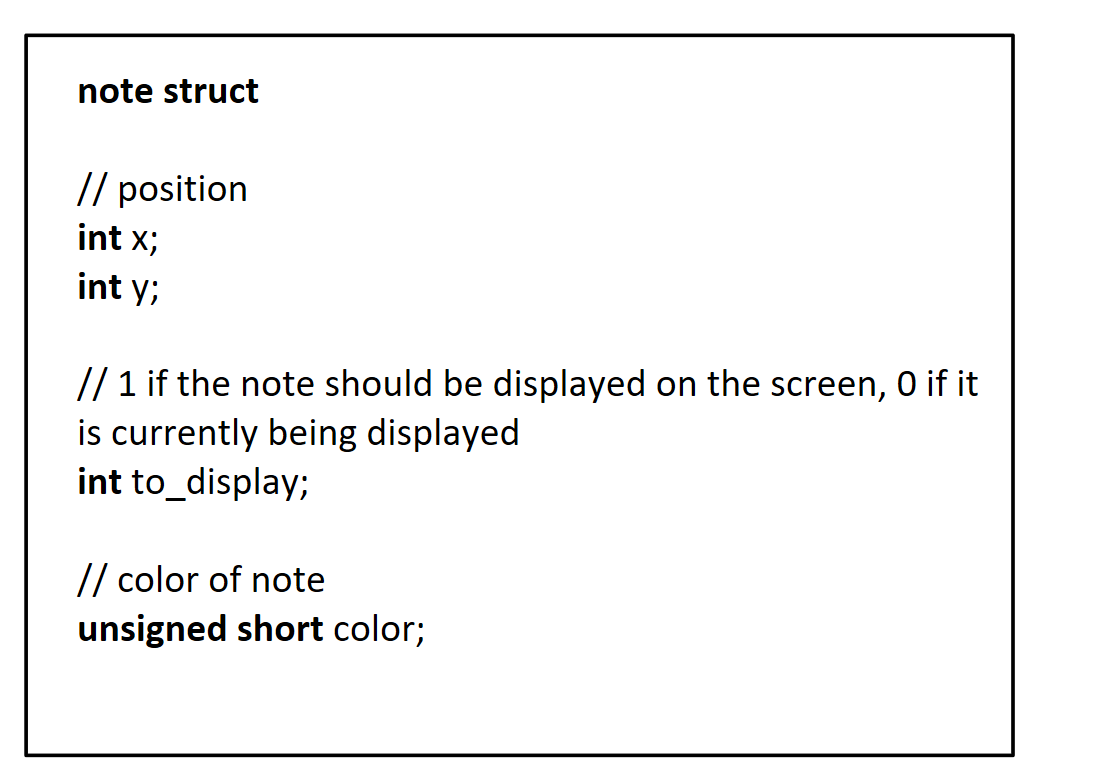
We needed a struct to keep track of the notes falling on the screen. Below is an overview of the note struct:
Figure 2: Note struct
We create an array of notes at the beginning of the game with 20 notes in each of the 5 color columns. As we go through the song, we determine which column each note should be placed in based on the display note number in our song array. Depending on which column we need to put the note in, we find a note in the notes array in the corresponding column that is currently not being displayed and initialize it to be displayed. To initialize the note, we set its x value and display value so that it appears on the right side of the screen.We then go through the array in order, updating the x position to make the note move down the screen. If the user earns a point, the note will disappear when they earn the point. Otherwise, it will run the entire length of the screen until it goes off screen and we erase it.
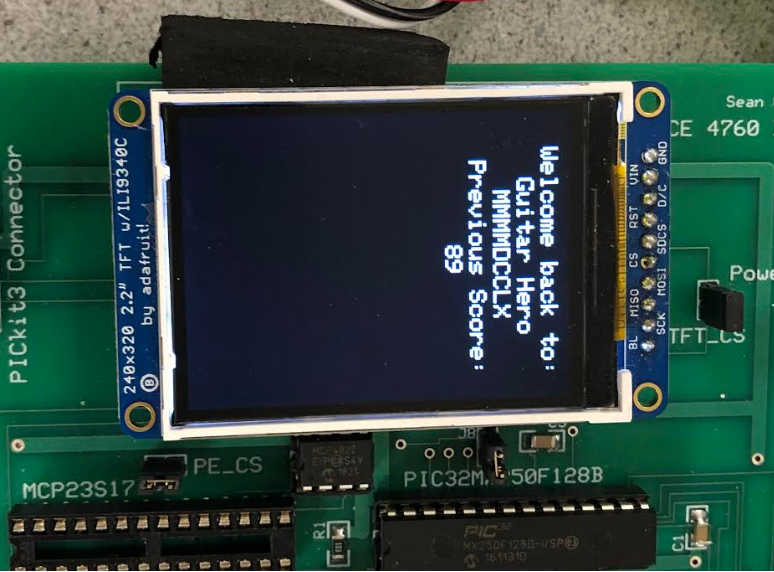
We also needed to create a menu with menu options. Our menu is displayed when the program starts, and when the song is over and the game resets. The points from the last run of the game are displayed on the screen, so that when it first starts there are 0 points on the screen. See Figure 3 below for this design:
Figure 3: Home Screen
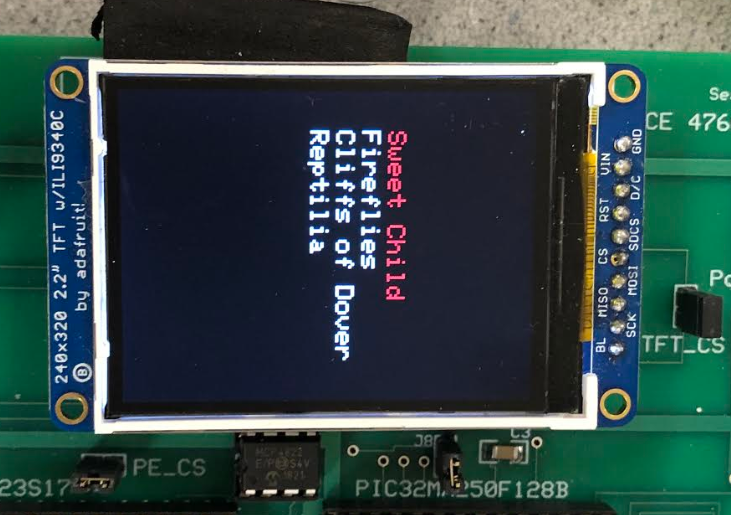
To get to the next screen, the user can press green the green fret button. This will take the user to a list of songs to choose from. To scroll through the songs, the user can use the strummer button which will correspondingly highlight a song in red. The user can press green to select the song they want which will take them to the next screen. See Figure 4 below for the song selection design:
Figure 4: Song Selection
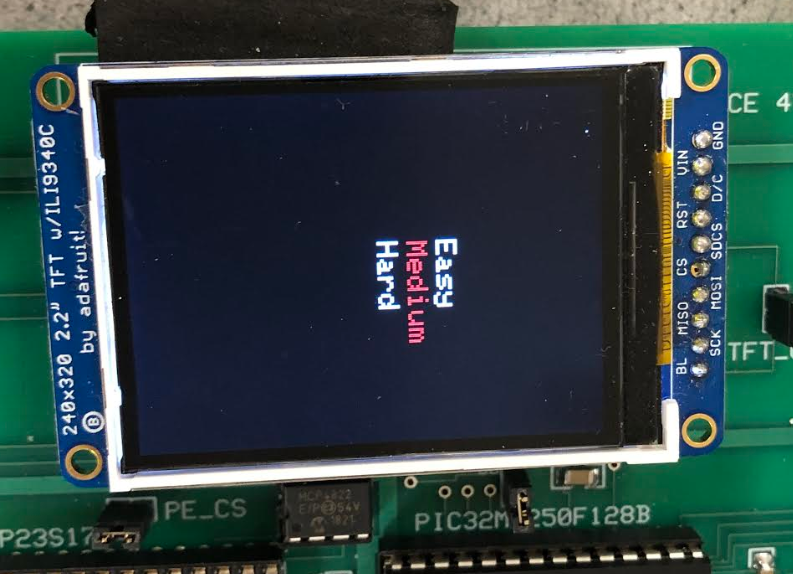
The next screen, shown in Figure 5 below, displays the difficulty levels. The user can scroll through the difficulty levels to select one by using the green button, which will start the song and go to the Game Play screen. If the user decides they want to choose a different song to shred on, they can press the red button to go back and select a different song. When selecting a difficulty, the user is really selecting how many notes will be displayed on screen during the game. We mod the note number by either 1, 4, or 8 and check whether the result is 0 to determine whether or not to display the note. 1 is for hard because any number modulo 1 is 0 so each note that is heard is also displayed on the screen, and 8 is for easy because it displays every eighth note. Regardless of the difficulty, each note is played through the DAC so that the entire song is played, but the user will only have to play the notes according to the difficulty value.
Figure 5: Difficulty Selection
We used state machines not only to debounce, but to store information for the menu. We use them for the difficulty, menu screen, and song. For difficulty, we had three states with easy, medium, and difficult. For menu screen, we have the main menu, songs menu, and difficulty menu. Lastly for the songs, we have our four songs that can be played. State Machines were extremely helpful because they allowed us to modify global variables that allowed us to display the correct menu on the screen, indicate to the user which option they were selecting, and change the settings for the other threads such as the difficulty and song variables to set how many notes the user would have to play, and for which song.
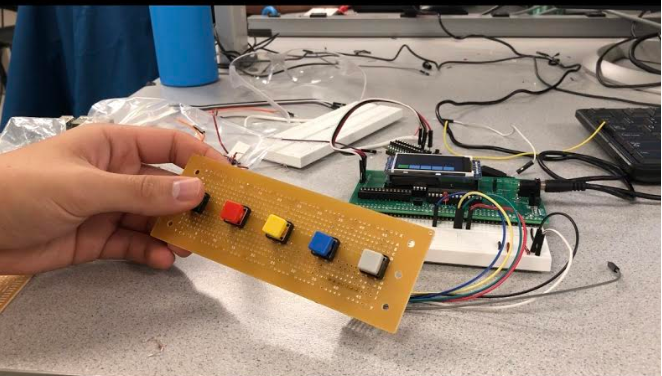
Figure 6: Button Protoboard
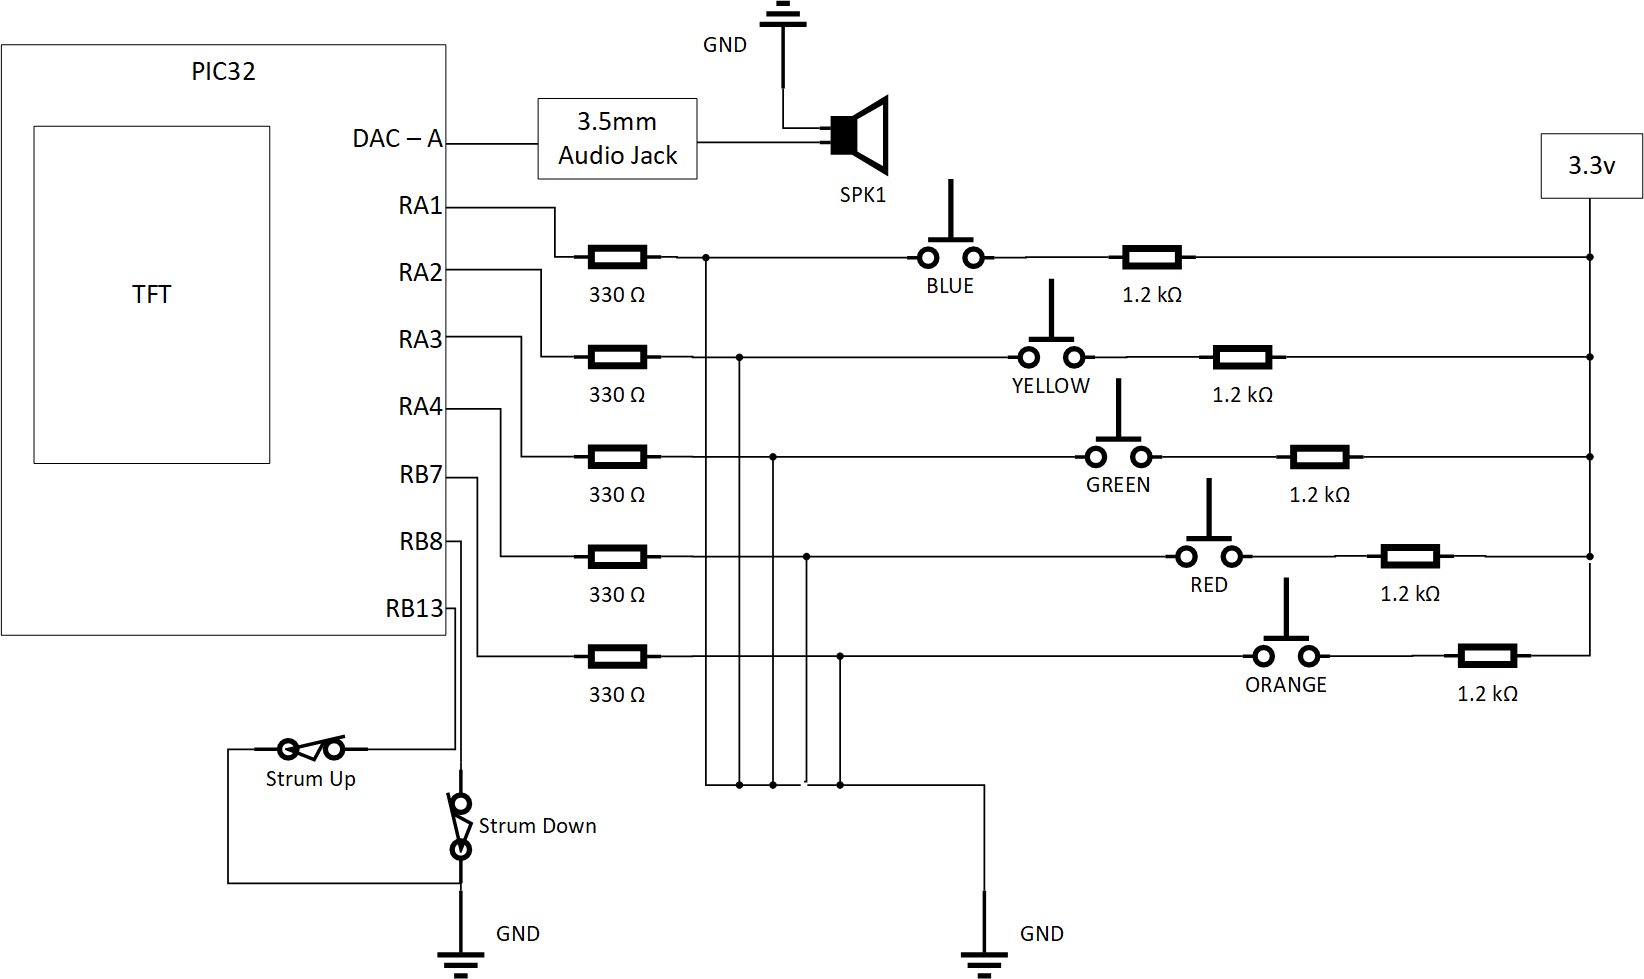
For our note circuit, we used 5 push buttons from SparkFun and soldered them on a proto board. See Appendix B for the schematic of the hardware.
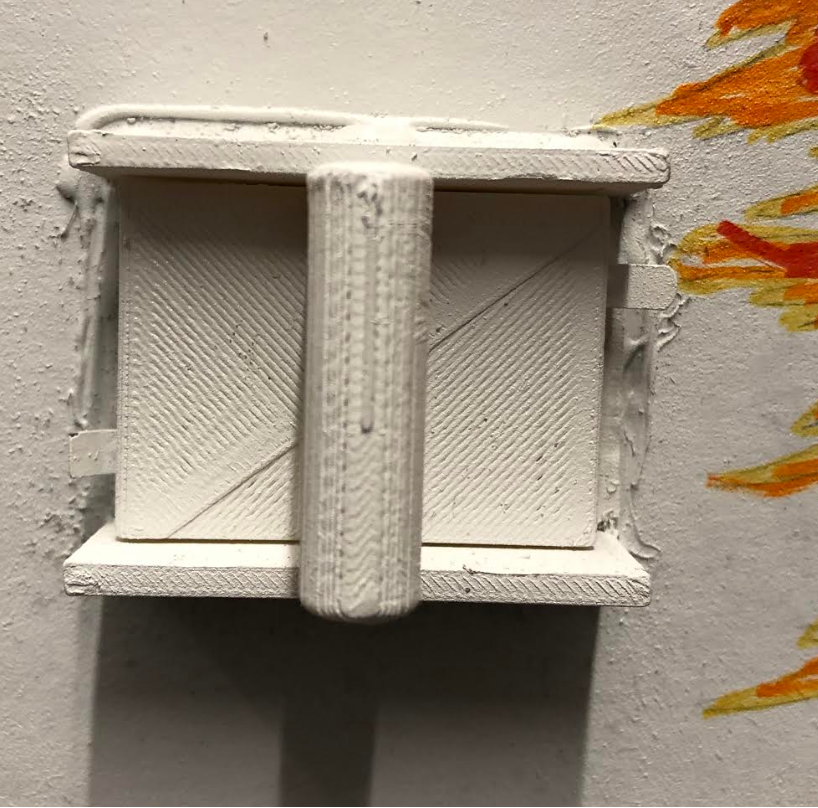
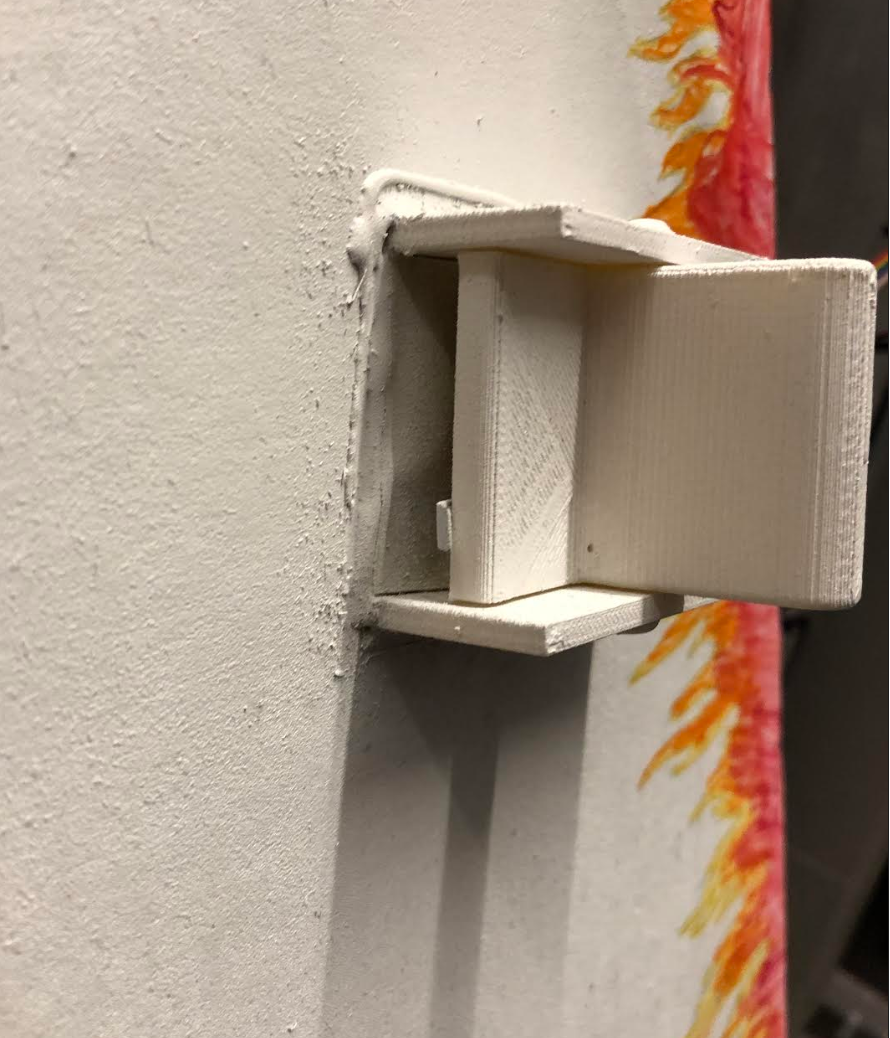
We wanted to be able to recreate the classic strummer from the Guitar Hero game. This meant we needed some sort of rocker that rocks between two switches to indicate a strum up or a strum down. Bruce gave us two limit switches, which you can press up and down with a lever. We designed and 3D printed a chassis for the switches with the rocker to go on top. This is the final printed design:
Figures 7 & 8: 3D Printed Strummer
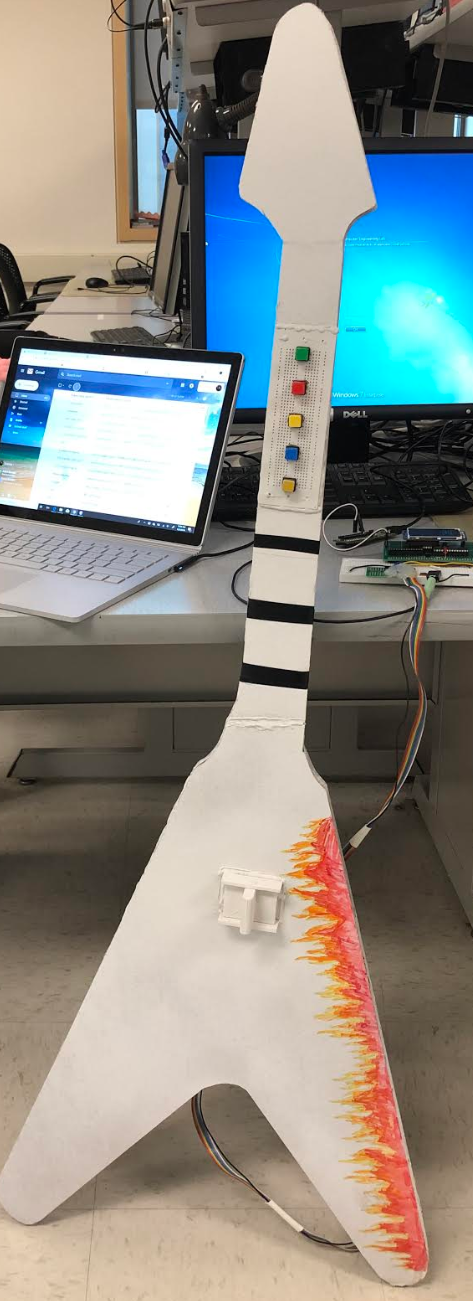
To create the controller, we laser cut cardboard in the shape of a guitar. We laser cut 4 layers for structural integrity, and used hot glue to connect the pieces together. We were going to use acrylic for the guitar base, but this would put us over the budget. We cut a hole to put the strummer in. We then used heat shrink to cover the wires and make one long wire for both the buttons and the strummer. This was soldered to a small proto board which was used to plug into the breadboard when the user wanted to play. This can be seen in Figure 9 below.
Figures 9: Final Controller
We found that our game was convincing and quite effective in terms of the number of songs we could store. By representing each note as only two ints, we found that each song was about 4 kB so we would be able to store around 32 songs. In addition to this, we were able to realize a difficulty selection system that only required a single int and a few clock cycles to calculate a modulo each 200 ms. By spending a significant amount of time working on the menu button interactions, we ended up with a menu system that was very easy to navigate. Holding down the red or green buttons would only count as a single button click meaning that you wouldn’t advance multiple screens accidentally by clicking too slowly. Similarly for the rocker we made sure that the cursor always could be moved with a single click.
For the game play, we were able to get 15 frames per second consistently throughout the game. Additionally, we combined the note display spawn thread with the sound generation thread so that we could guarantee the notes and sound were synced together. With our system of using bins to determine which of the five colors each note should be, we ended up with an even distribution of notes throughout the songs. As for the user inputs, we found that our method of polling the input ports for button inputs every 10 ms gave a very responsive game. When it appeared on the screen that the user had pressed the correct note and strummed at the correct time, the note would disappear and the points would increment.
As far as safety is concerned, Guitar Hero MMMMDCCLX has a few, relatively minor considerations. The first is related to the physical, tactile nature of the buttons. We recognized that ergonomics plays a pivotal role in their layout and accessibility, realizing only when it was fully assembled that our design may induce slight cramping and difficulty playing the game. The buttons are spaced relatively far apart, a design decision that initially made it easier to play on a breadboard, but when mounted onboard the guitar, those with average-sized hands expressed difficulty after prolonged periods of play. Additionally the strum switch mechanism consists of two limit switches. Given the limited testing time available, we were unable to appropriately size a comfortable resistance for these switches. So, while they provide a very satisfying click as feedback, they are, at least initially, hard to strum.
Beyond the button interaction standpoint, we made use of the LCD TFT display. While a critical element of our gameplay involves moving shapes and changing colors, we made a concerted effort to minimize rapid flash-like animations, so as to reduce possible risk of inducing seizures in those prone to such events.
Such is also the case with accessibility for color-blind players. While we could have included a shape-based gameplay mode, we instead opted for a simpler layout of fret buttons corresponding directly to their on-screen order.
Our music in our program, while based upon commercially written titles, is synthesized from royalty-free MIDI files.
No radio communications were used in this project. As far as we know, no other regulatory body or other government regulations apply to this venture.
Our game reached our expectations by the end of the project. We were hoping to make a game that played and looked like Guitar Hero by using MIDI files and DDS for music generation. In the end, we ended up with a game that checked off all these boxes. It is fun and easy to play, has a start menu, can play multiple songs, and can play songs that are pretty recognizable through DDS.
In terms of meeting applicable standards, our game was very responsive to user inputs and was simple to play. The threads responsible for button inputs ran once every 10 ms which is significantly faster than a human can detect any latency. Additionally, our life-size guitar controller makes playing the game more similar to the original game. Unfortunately the buttons were a bit too spaced out as we have mentioned so it was slightly harder to play with this controller than with the Guitar Hero official guitars.
Future Modifications
To modify the game in the future, we would like to correct the timing for the notes so that we use the timing aspect of the MIDI file to play the songs. This is our main fix. We would also like to make the controller more user friendly by changing the buttons. It would also be nice to display the GUI on an actual monitor rather than the TFT, which is quite hard to see, although Bruce says this would be its own separate project! We would also like to eliminate the pre-processing aspect of our game, so that the C program can interact with the Python script such that we do not have to do multiple steps to play any song on the game. These are all potential additions if we decide to continue our project as an independent study, or side project, in the future.
Intellectual Property Concerns
We did not reuse anyone’s code nor did we use any code from the public domain. We were reverse engineering Guitar Hero, the video game, but since we did not use any of their code or use any of their artwork (only the idea behind the game), we should be safe from any copyright issues. Because our project is based on a game that is vastly popular our project is not worthy of a patent. Going into the future, if we add the Karplus-Strong synthesis algorithm and add more timing functionality, our game could definitely be publishable. We did not have to sign a non-disclosure form as we did not sample any parts.
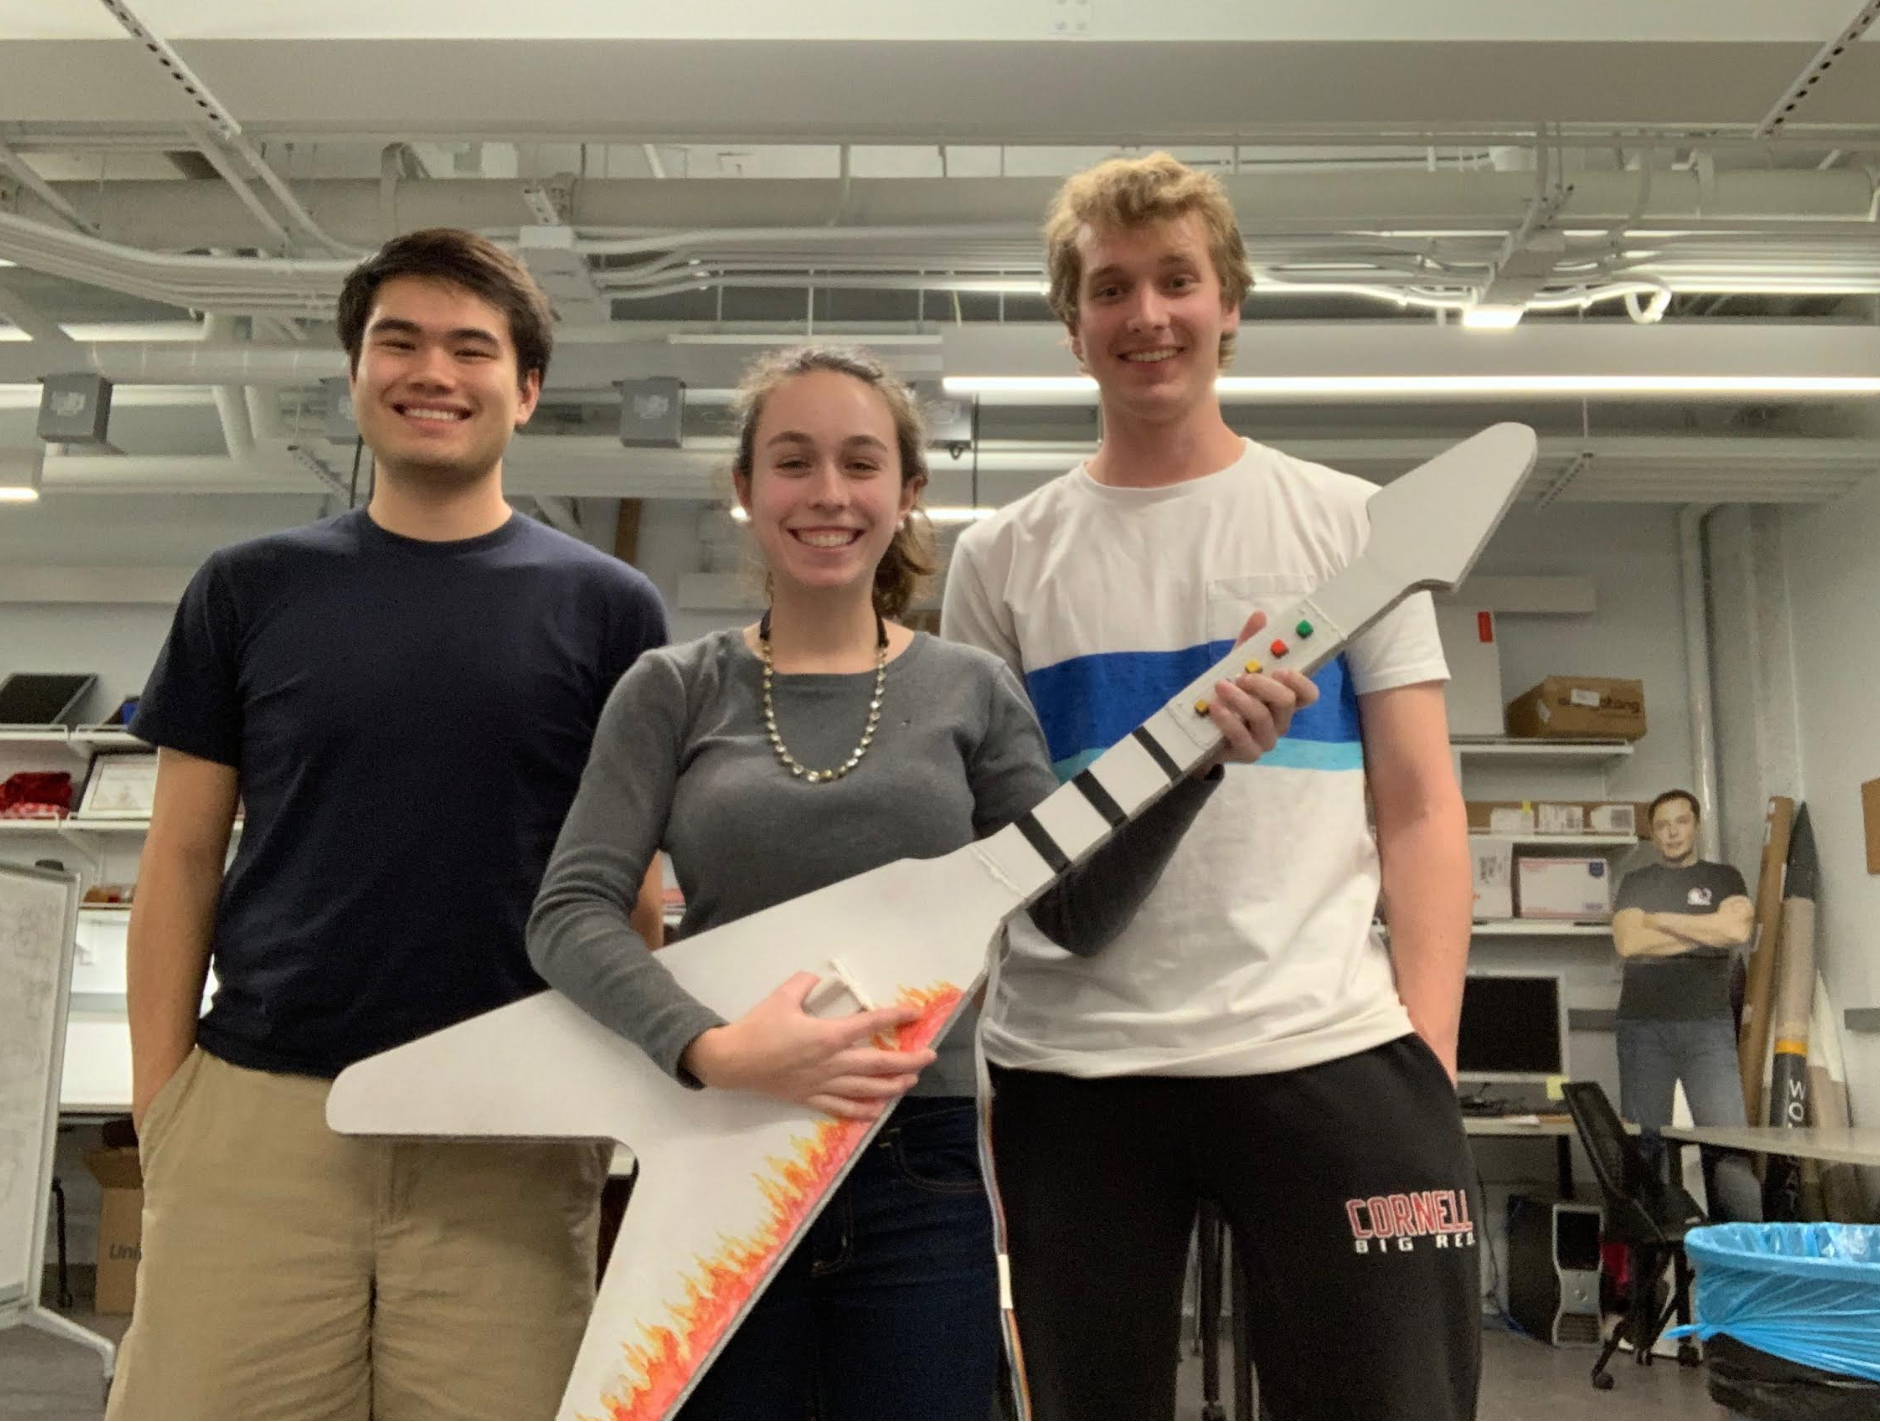
Liam, The Guitar Hero
The group approves this report for inclusion on the course website.
The group approves the video for inclusion on the course Youtube channel.
Part | Vendor | Quantity | Price |
Colorful Square Tactile Button Switch Assortment | Adafruit | 5 | $5.95 total |
Limit Switch | Lab stock | 2 | $18.83 |
PIC32MX 250F128B | Digikey | 1 | $5.00 |
MCP4822, 12-bit DAC | Digikey | 1 | $3.15 |
Speakers | Lab stock | 1 | $20.00 |
Breadboard | Lab stock | 1 | $6.00 |
Resistors | Lab stock | 15 | $0.50 |
Wires- ribbon cable | Lab stock | 6 feet | $4.36 total |
Heat shrink tubing | Lab stock | 1 foot | $0.10 |
Cardboard | scrap | 24 sq. feet | $0.00 |
Hot Glue | Lab stock | 3 sticks | $3.00 |
Total Cost: $92.72