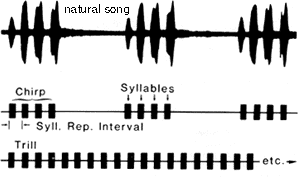
You will construct a cricket-call generator which will produce audio output of a simplified cricket call. A cricket call may be very complex, but we will limit ourselves to the following form.
The image below summerizes the definition ( from Manfred Hartbauer).

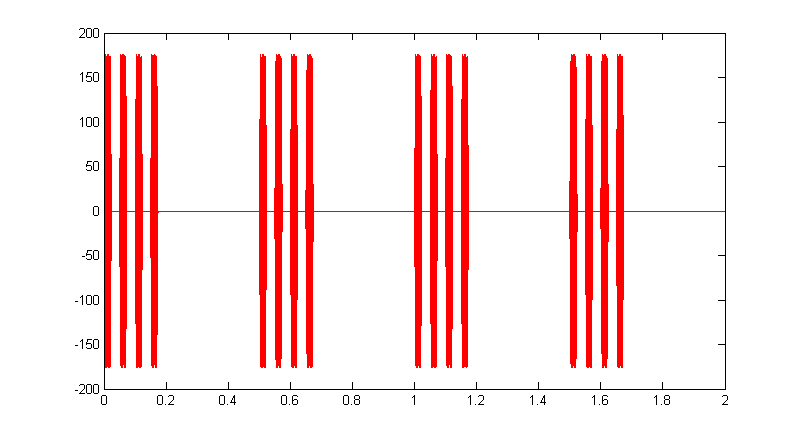
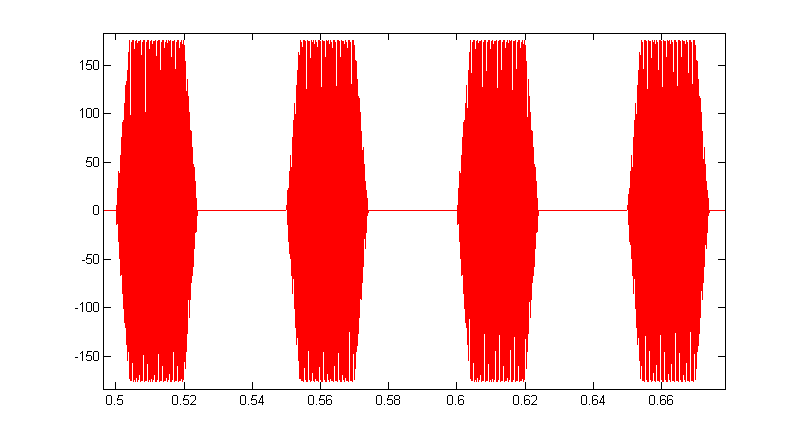
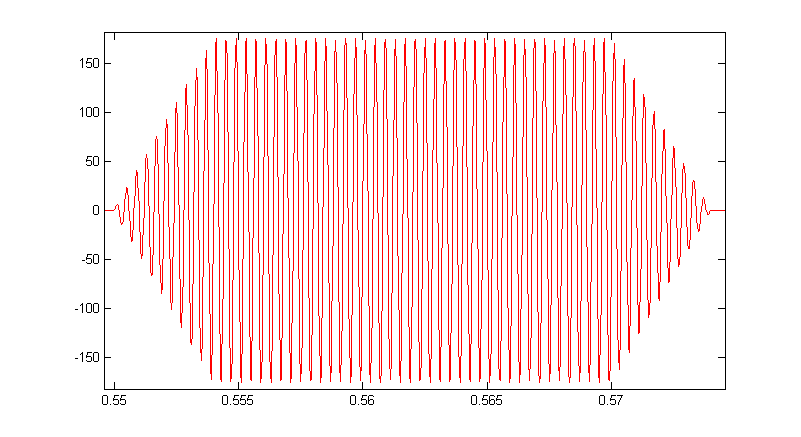
A matlab program generates such songs, but is not real time. The following images are three zoom levels of a song generated with chirp_repeat_interval=0.5 sec, syllable_duration=0.02, syllable_repeat_interval=0.05, syllable_count=4 and burst_freq = 2500 Hz. The syllable rise time was set to 4 mSec. The second image shows one chirp of the first image and the thrid image show one syllable of the second image.
Procedure:
Hints on debugging are here.
Remember to fix the floating point library: In the menu item Project-> Configuration Options -> Libraries click on libm.a, then click on Add Library, and press OK.
Keypad
You will use a keypad to control cricket synthesis with audio output to a speaker. Analog output will be in the form of a PWM signal which will
be filtered using a simple RC circuit to low pass filter the analog signal.
Use a big enough resistor so that you don't load the port pin, and small enough
to be below the input resistance of the speaker audio input (10 kohm). You should
set the RC time constant to about 2 to 10 times the period of the PWM, but not big enough to excessively attenuate the call frequencies. The output
of the lowpass filter will go to the audio input of the speaker. The PWM signal will
be sine wave bursts generated using Direct Digital Synthesis
(DDS) technique. A short example shows how you might implement
a DDS. For this lab, you will need to modulate the amplitude of the DDS unit. The sine wave table will need to be scaled to prevent overflow. Use the timer0 fast PWM mode
with the prescalar set to 1 to produce about 62500 samples/sec. This example shows how you might amplitude modulate a sine wave.
You will need to control various intervals of time and generate the PWM signal. I suggest the following timing scheme, but you may use any scheme you want. Timer 0 is used to generate the high speed PWM-based D/A signal necessary for the sound synthesis. The output will be through OC0A (port pin B.3). In PWM mode, each PWM cycle completion is signaled by the overflow interrupt. The timer0 overflow ISR is therefore used to load a new output compare value for the next audio sample. In this ISR you can also increment a counter to count to 1 mSec. The resulting 1 mSec time base will be used to control all other timing (in the main program, not in the interrupt).
You will need to get user input from a keypad with one of two following configurations. Some keypads have the connector on the top, as shown. Some have them on the bottom. A demonstration keypad scanning code for testing your connections is here. An example of a debounce state machine for a single pushbutton (not the keypad) is included here for reference. Both of these examples assume active-low pushbuttons and active-low LEDs. If you use PORTD for the keypad, you must unmount the serial communication jumpers which connect D0 and D1 pins to an USB interface chip and D2 to the LED.
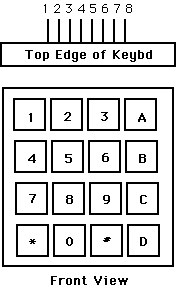
Connector: top:8-pin top:9-pin bottom 12-key Pin 1 ---- row 1 2 3 A col 1 col 1 row 1 Pin 2 ---- row 4 5 6 B col 2 col 2 row 2 Pin 3 ---- row 7 8 9 C col 3 col 3 row 3 Pin 4 ---- row * 0 # D col 4 col 4 row 4 Pin 5 ---- col 1 4 7 * row 1 row 1 col 1 Pin 6 ---- col 2 5 8 0 row 2 row 2 col 2 Pin 7 ---- col 3 6 9 # row 3 row 3 col 3 Pin 8 ---- col A B C D row 4 row 4 ---- Pin 9 ---- (NO CONNECT--common) (a) Each switch shorts one row to one column. (b) Each pin should be connected to one bit of an i/o port.Audio
Use a 300 ohm resistor between each i/o port and keypad pin. (c) The i/o port pins will be used both as inputs and outputs. When they are inputs, they should have active internal pullup resistors.

Scope to Computer
You can connect the oscilloscope to the computer with a USB cable (type-B connector) attached to the back of the oscilloscope (not the type-A connector on the front).
To use the Tektronix software on the PC:
OpenChoice Desktop in the start menu, and start the program. Select Instrument.USB device, and click OK.Get Screen.
| parameter | chirp |
number of syllables | syllable |
syllable |
burst frequency |
| call 0 | 20 | 1 | 10 | --- | 4500 |
| call 1 | 250 | 4 | 18 | 30 | 5000 |
| call 2 | 1500 | 50 | 8 | 20 | 6000 |
| call 3 | 1000 | 5 | 30 | 50 | 3000 |
| Range | 10 to 1500 | 1 to 100 | 5 to 100 | 10 to 100 | 1000 to 6000 |
Demo this program to a staff member using a speaker. Show that all specifications are met by verifying times and frequencies with an oscilloscope. Your program should not need to be reset during the demo.
Your written lab report should include the sections mentioned in the policy page, and :