Immersion Cooker
An ATMEL based microcontroller powered auto-sensing immersion cooker (with bluetooth!)
Harrison Wong (hcw29), David Diner (dg386)
About What is this thing?
For our ECE4760 Spring 2012 (Microcontrollers) Final Project at Cornell University we decided to create a sous-vide cooker (a type of immersion cooker) that can maintain a set temperature for extended periods of time. It can auto-calculate the appropriate time for cooking a certain thickness of meat using heat transfer equations.
What is sous-vide? Simply put, it's a way of cooking food in airtight plastic bags under water for a long duration. This requires setting a temperature to keep the water constant at, to allow the food to reach a constant temperature very slowly.
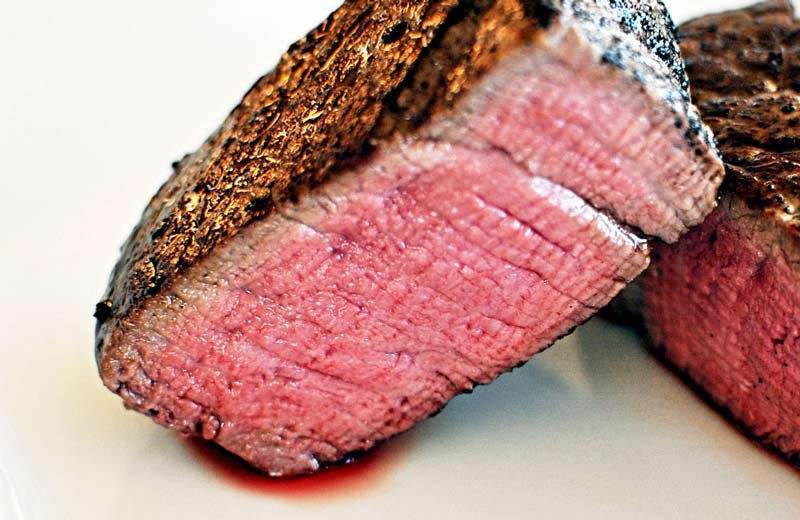
Why go through all this trouble? Look at that delicious piece of steak! Normally when cooking meat, the outside cooks faster than the inside, as it reaches higher temperatures faster. Sous-vide cooking however, maintains a constant temperature to slowly cook the entire meat to the same temperature. This allows for relatively low cooking temperatures (140° F) to make perfectly rare and safe meat. The extended period of time under this temperature kills bacteria just as well as a shorter amount of time at high temperatures, without damaging the outside of the meat. Sous-vide cooking also seals in the moisture of the meat while cooking, leading to juicier steaks.
A rare cooked steak
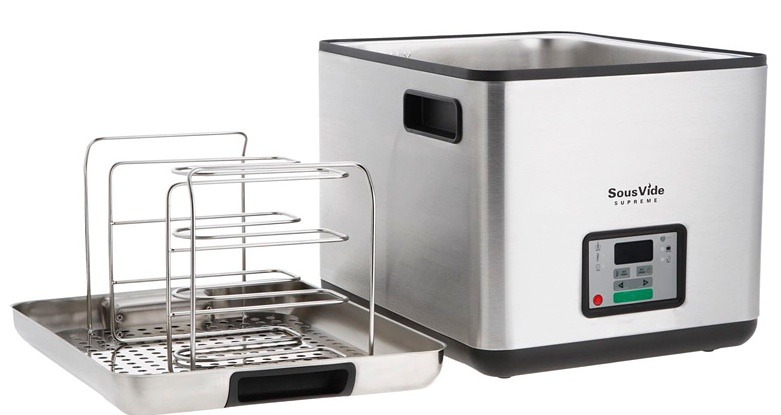
So why make a sous-vide cooker ourselves? What makes our cooker different? We were able to create our cooker for under $75, which is in stark contrast to the $300 sous-vide cookers for home use. Just a sous-vide controller itself costs $150, not including a heating unit. Moreover, we implement advanced features, such as a water level monitor, as well as a automatic timer that can set cooking times depending on the quantity of food cooking.
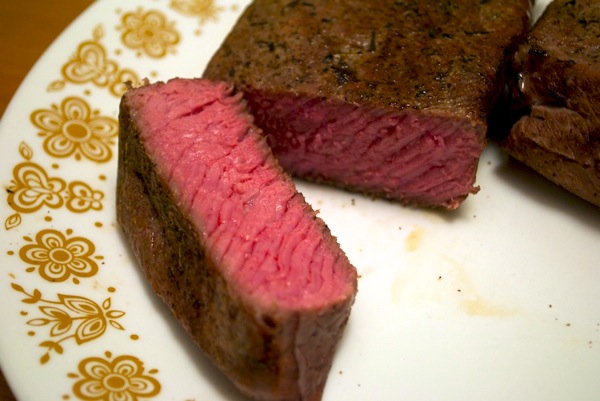
So did it work? You bet it did! We've tested it up to 150°F which is is good enough for medium-well cooked steak (we refuse to cook well done). The system performs perfectly for an extended amount of time at this temperature.
High Level Design
The general idea of what we needed to do for our project is to create a water temperature regulator with a high degree of accuracy. This led to some hardware and software design decisions that we made.
Hardware Decisions
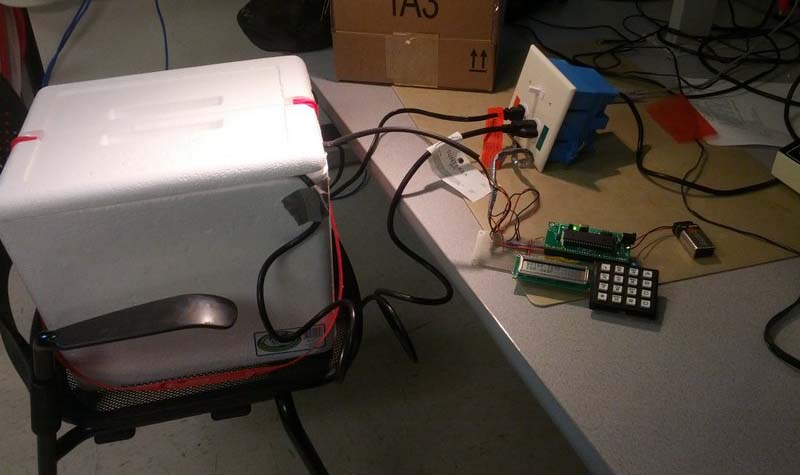
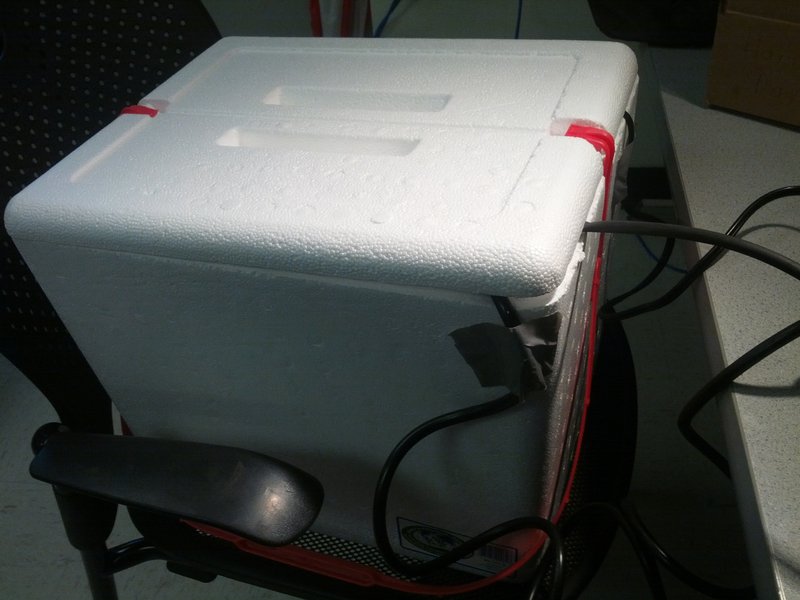
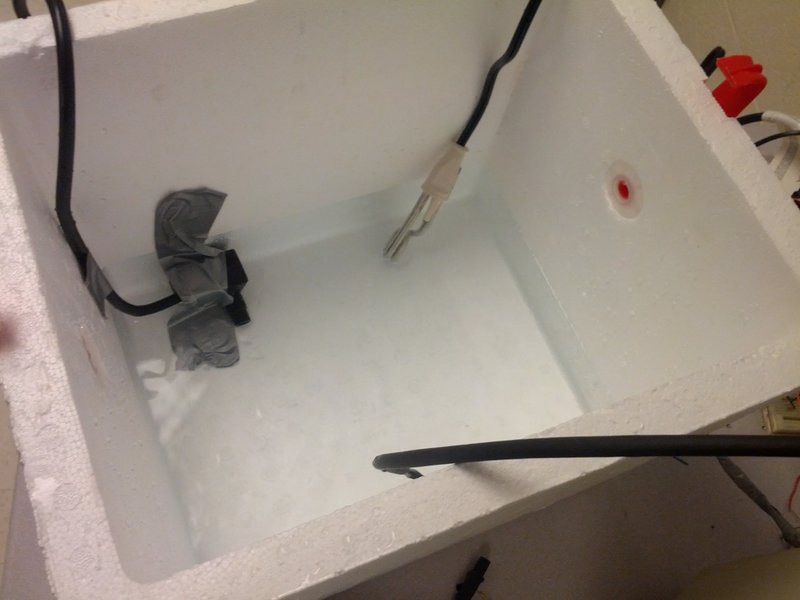
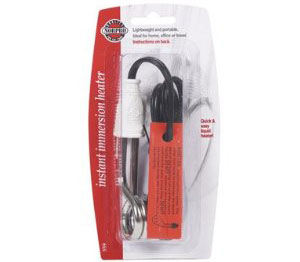
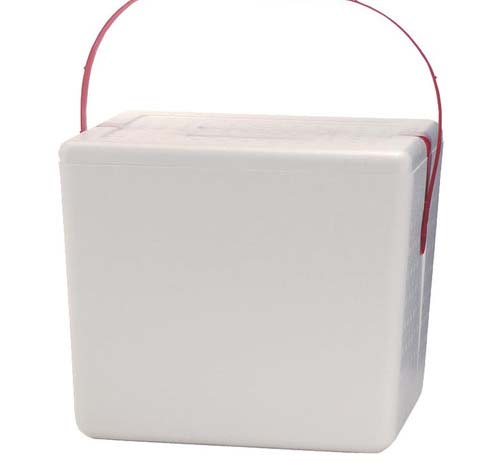
The main objective of the temperature regulator is to maintain a constant temperature throughout the water and to regulate it when cold food is added or warm food is removed. This idea lead to us deciding to use a foam icebox/cooler to hold the water, as it would be well insulated from outside losses. Because we have an insulated box, we opted for a medium wattage immersion heater (around 300W) to keep costs and power down. Overheating the food in this style of cooking is very bad, while under-heating is acceptable since it will be recovered over time.
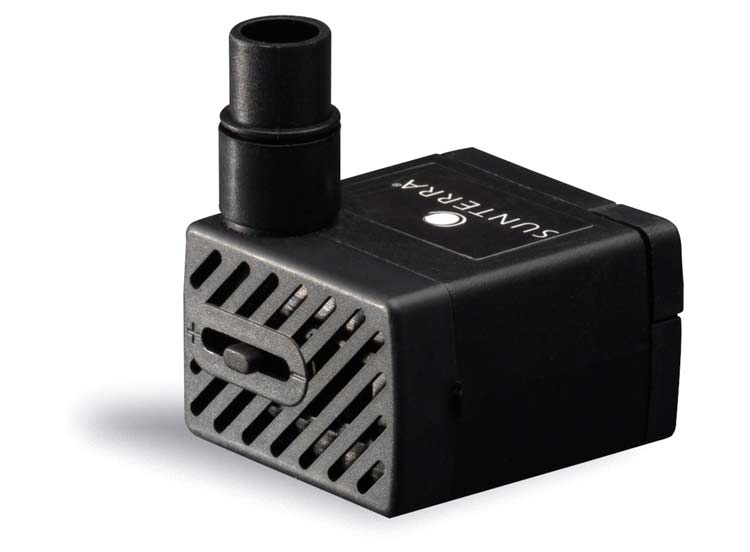
To maintain the constant temperature throughout the water, we opted to add in an aquarium pump to circulate the water. We need this because the temperature sensor needs to have an accurate reading of the total temperature, the immersion heater does not circulate the water enough by convection and the food should be maintained at a constant temperature. We used a low power aquarium pump that would be running whenever the system is on.
To monitor the temperature of the water, initially we decided to use a thermocouple. Further research into thermocouples showed us the downsides such as relative cost and high circuity precision necessary to read a precise temperature. We decided to use a solid state temperature sensor with a tight degree accuracy.
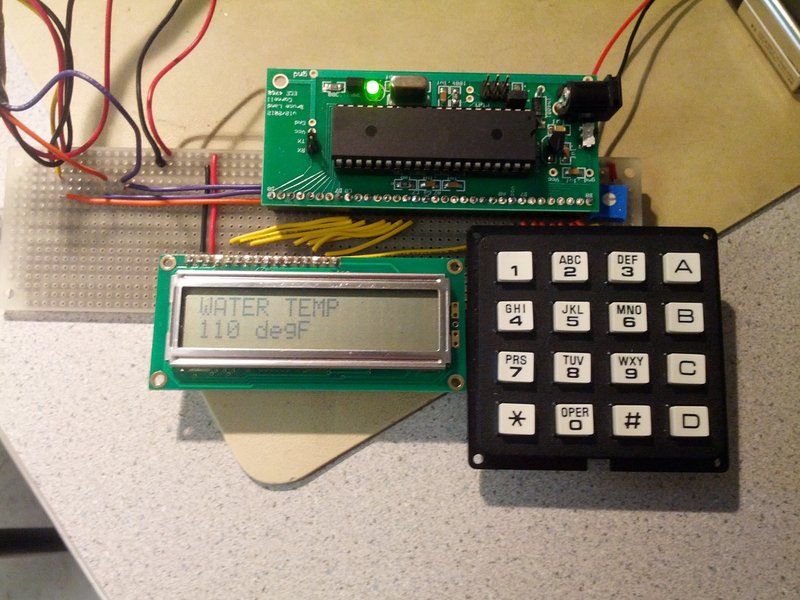
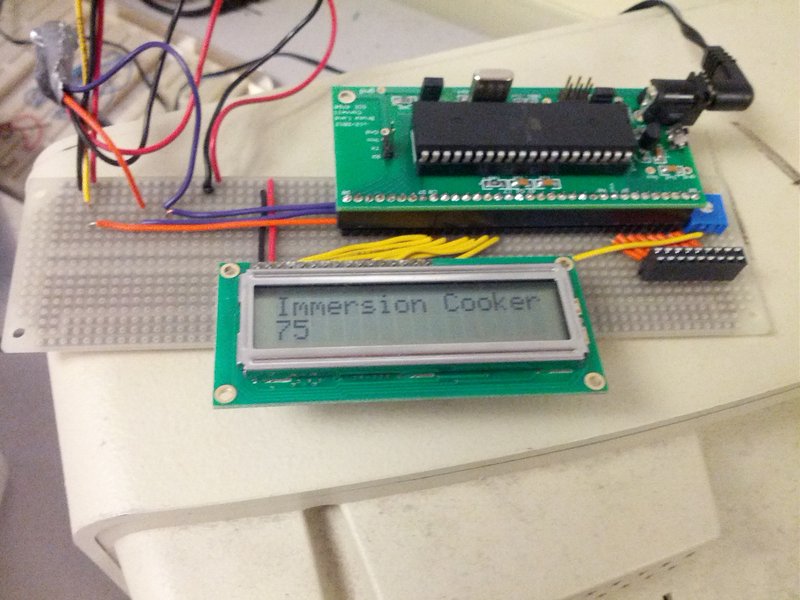
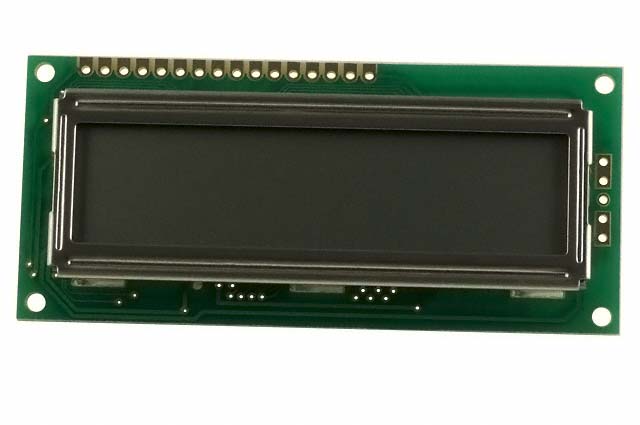
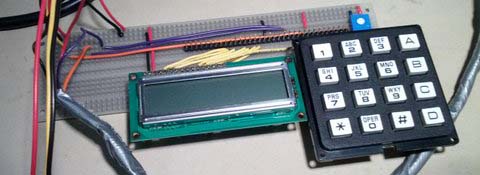
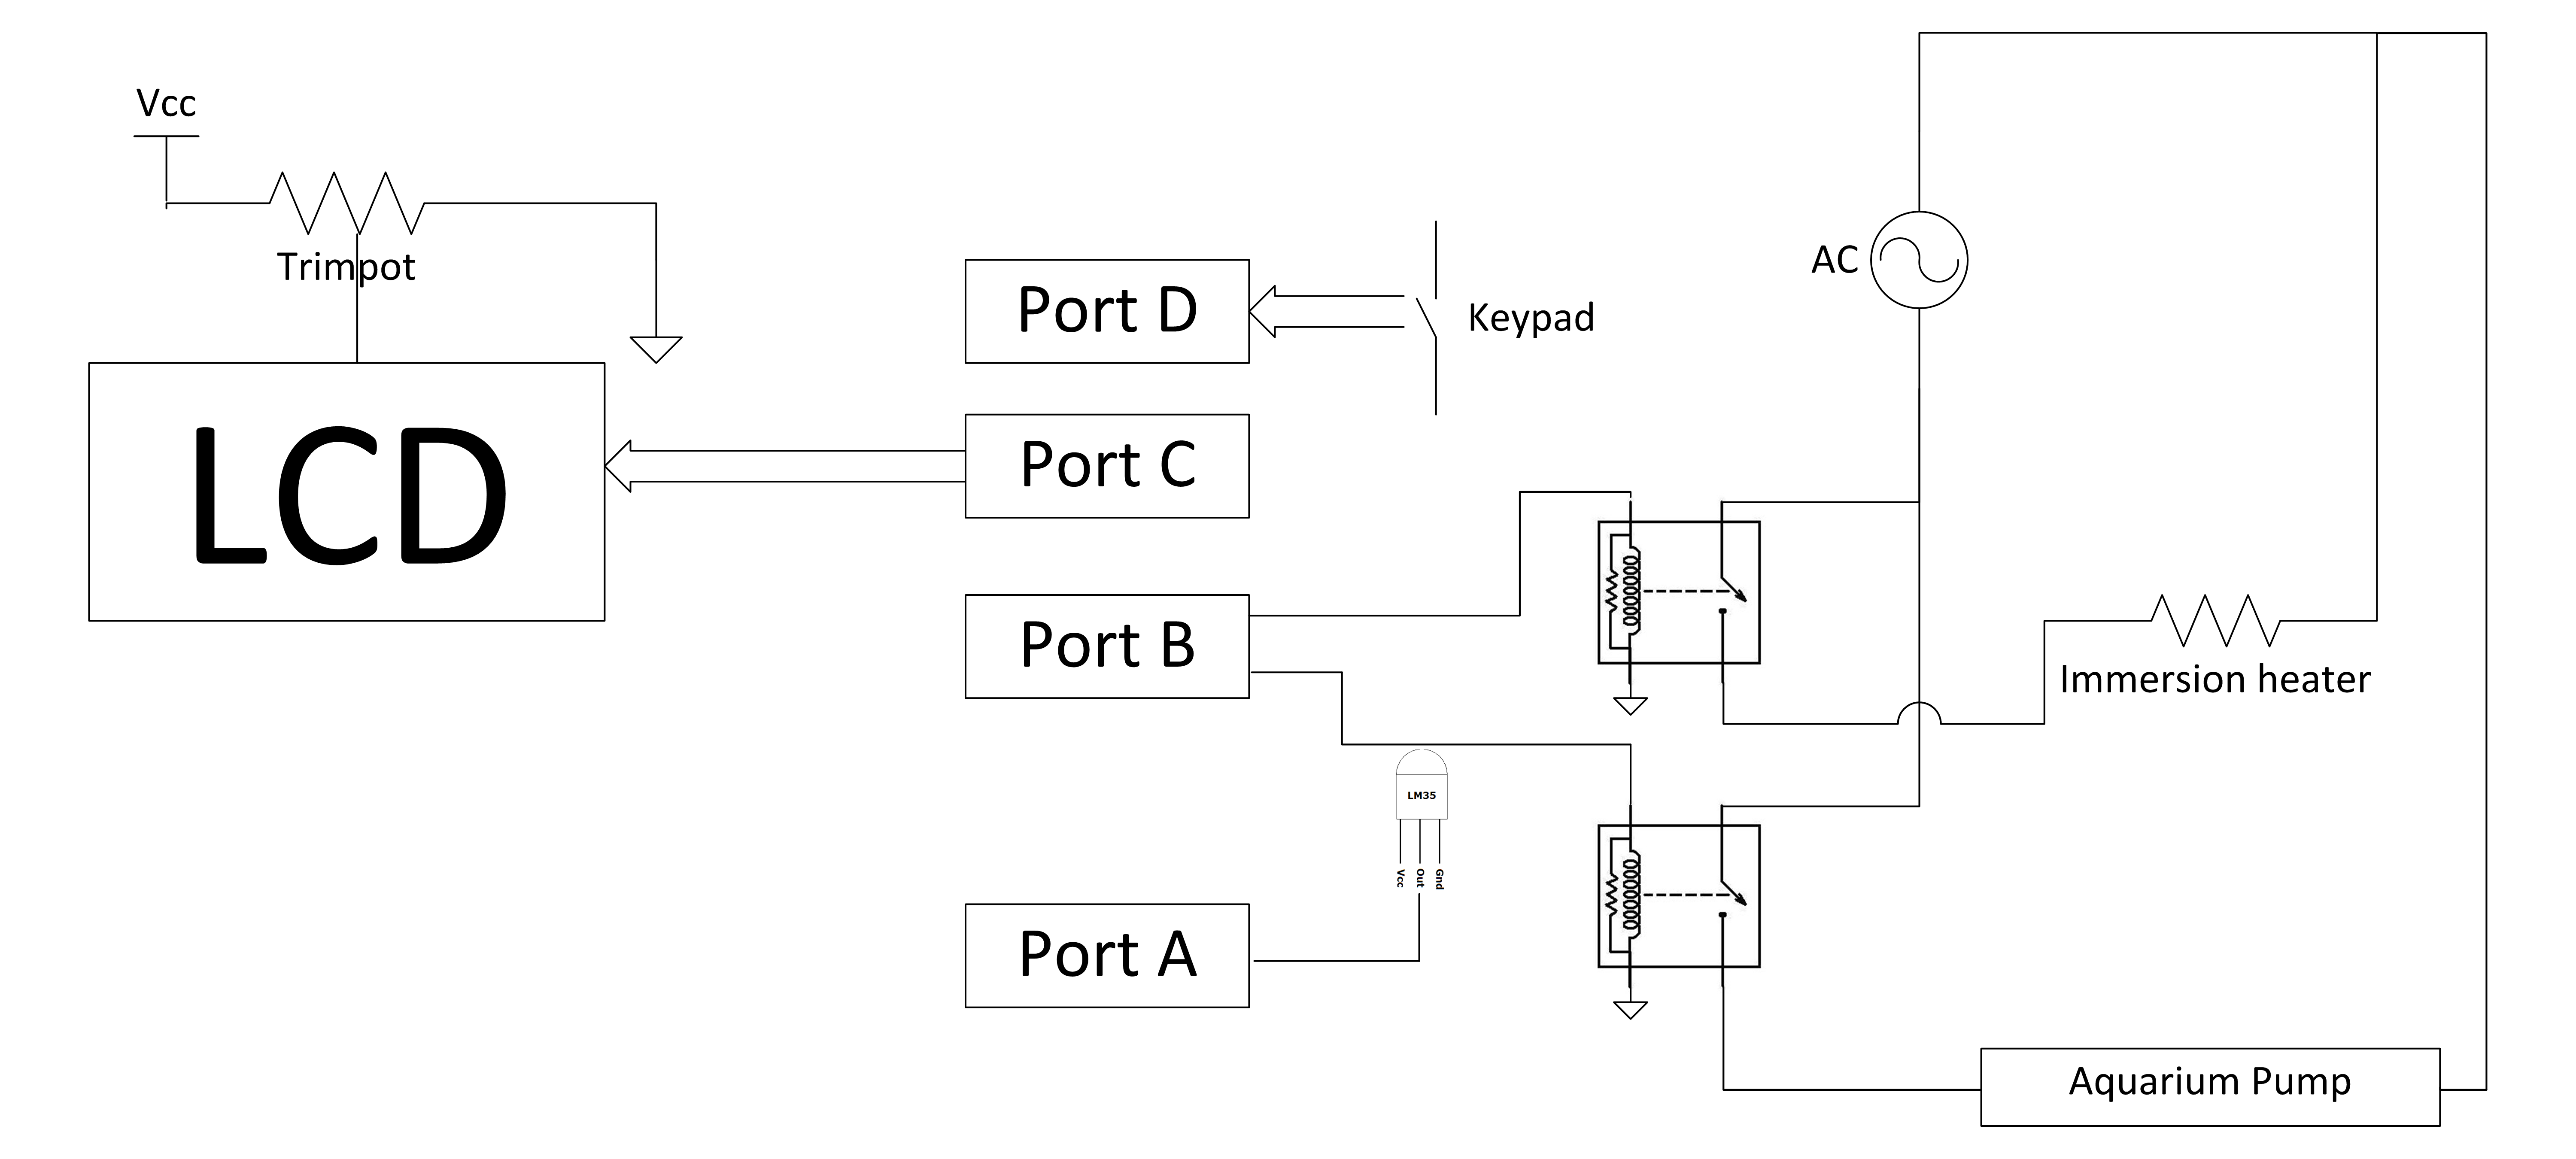
We decided to use the AVR boards provided by our professor because of our experience programming them and the ease of access. We used a LCD and Keypad along with this for displaying settings information and current temperature, with the keypad for inputting settings.
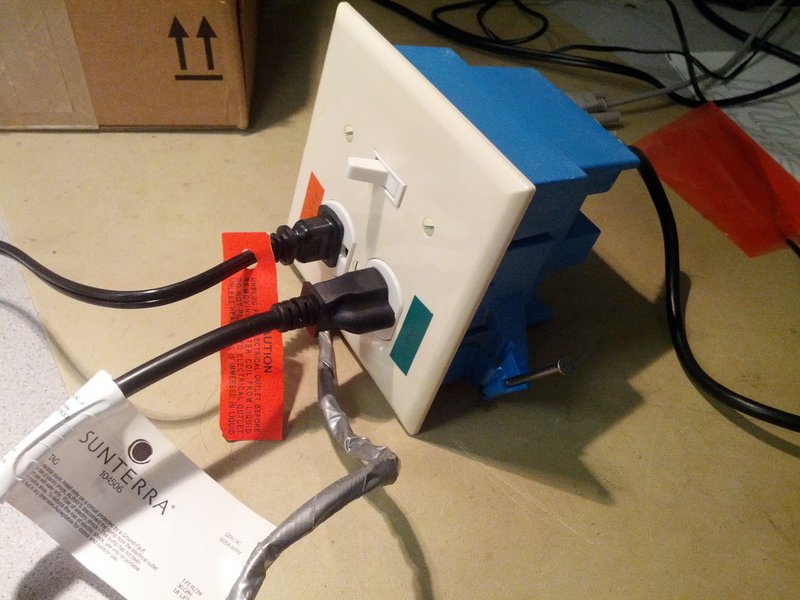
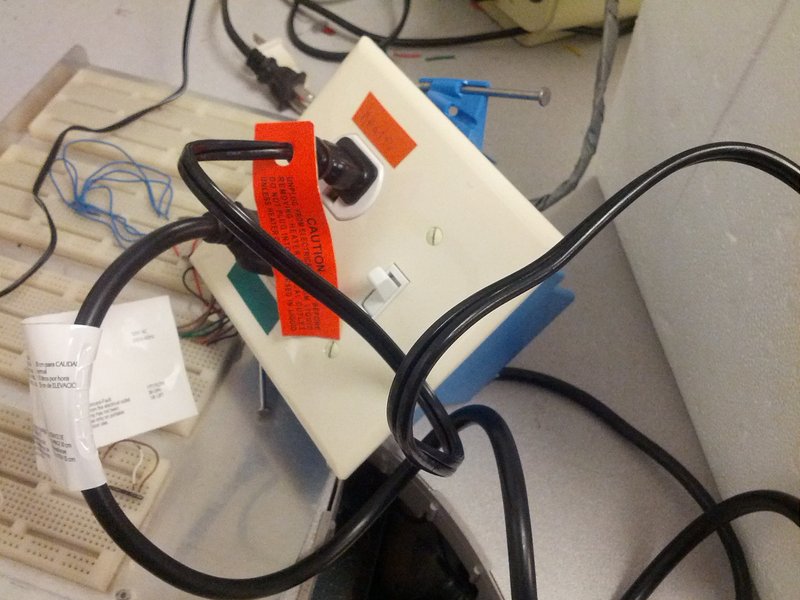
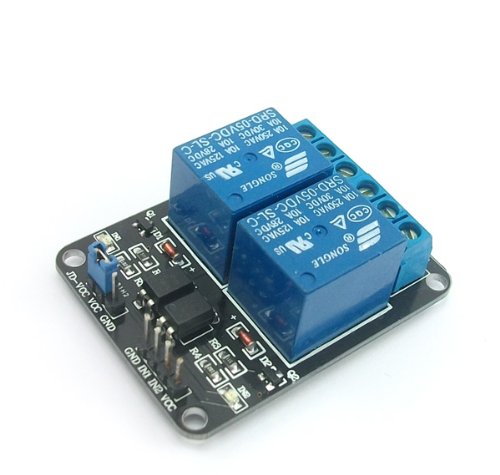
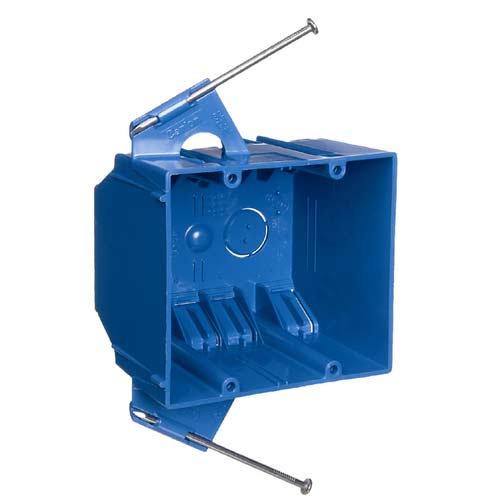
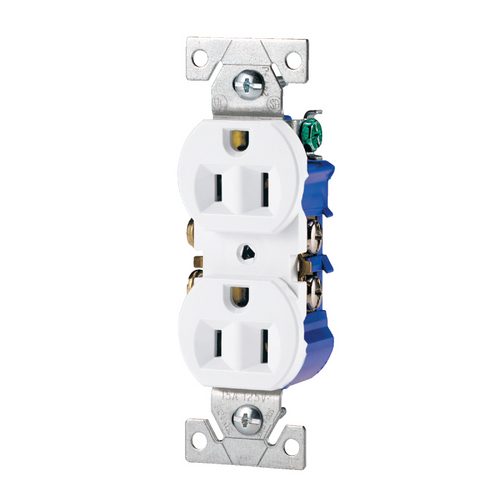
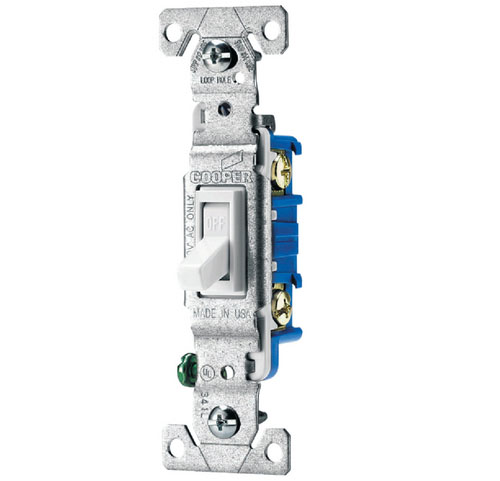
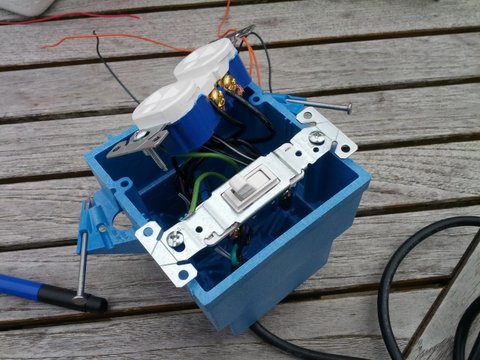
To control the immersion heater and water pump, we opted for using a junction box with standard wall plugs controlled by a relay module. This would allow us to change what kind of heater and pump we could use. Perhaps most important of all, we could isolate our high voltage components in an insulated plastic box, along with a switch to shut off all high voltage components if necessary. If in the future we decide to build other high voltage projects, this junction box could come in handy.
Software Decisions
We decided to use the TinyRealTime (TRT) kernel for running our code. We decided to do this because we would have multiple "threads" running at various times, but with no hard time requirements. A delay in reading data from the temperature sensor or outputting data to the LCD would not result in a malfunction.
We decided to model the system using a proportional-integral-derivative (PID) controller. We feel that the body of water fits this system as there is a lag between heating the water and when the water is circulated and the temperature sensor registers the change. Also, the heating element does not turn hot immediately.
Background Math
Our Sous-vide cooker has two stages. During the first stage, an empty bath of water is heated to a specified temperature. This is governed by Fourier's law of conduction,  . In this equation, Q is the heat generation, k is the thermal conductivity of the material being heated, and grad_T is the temperature gradient. For our project, Q is simply the power output by the heat generator (300 W) and k is the thermal conductivity of water (0.52 W * m^-1 * K^-1). This lets us determine the temperature distribution at the point where the heating element contacts the water. Since we are using a pump to circulate the water, there is also the convection equation to consider. The convection equation is
  . This equation can be solved to find the temperature at a given time as well as the temperature at steady state. However, solving this partial differential equation is difficult. Fortunately, we can measure the temperature of the water directly so there is no need to solve this equation. The second stage requires heating food to the desired temperature. This process is modeled by the heat equation
  . This is a partial differential equation and the closed form solution is an infinite series of decaying sine waves. Although we cannot compute the solution directly on a microcontroller, we can get a reasonable estimate for the temperature at the center of the food. This is because at the center of the material, most of the sinusoidal terms drop out.
We are using a simplified, 1-dimensional model of the heat transfer between the water and the food we are cooking to predict the actual temperature of the food. In this model, we assume that the temperature surrounding the food is kept at a constant temperature. This is a reasonable assumption since we are using the pump to circulate the water and the controller to keep the temperature constant. The second assumption we make is that the temperature of the food changes slowly. This assumption lets us use first order approximations to solve the heat equation without sacrificing too much accuracy. We use this approximation to determine the temperature of the food:  . We justify this assumption with the fact that exponential term dies off quickly. Additionally this lets us use more cycles to process the data since the temperature will not change significantly after a few seconds.
Software Tradeoffs
The only significant sacrifice we had to make was accuracy in the food temperature. In order to calculate the temperature of the food we needed to use a first order Pade approximation ( ) for the exponential function. This is a quick method which provides reasonable accuracy. The Pade approximation has the added benefit of being strictly less than the actual value of the exponential function. This means that the food we are cooking is guaranteed to be at least the reported value and no more than the water temperature. Thus if we report that the food is at a safe temperature to consume, then we know that the food is safe to consume.
Previous Work
The Sous-vide method of cooking is not patented. There are commercial Sous-vide cookers available, however, since we are not using any components of these devices
Parts List
| Cost | Part | Vendor |
|---|---|---|
| $6.97 | Styrofoam Cooler | Lowe's |
| $8.21 | Aquarium Pump | Amazon |
| $7.05 | Immersion Heater | Amazon |
| $8.99 | 2-Channel Relay Module | Amazon |
| $0.98 | 2-Gang Electrical Box | Lowe's |
| $0.74 | Combination Wall Plate | Lowe's |
| $0.59 | Duplex Electrical Outlet | Lowe's |
| $0.69 | Single Pole Switch | Lowe's |
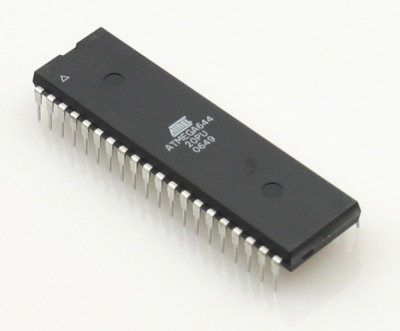
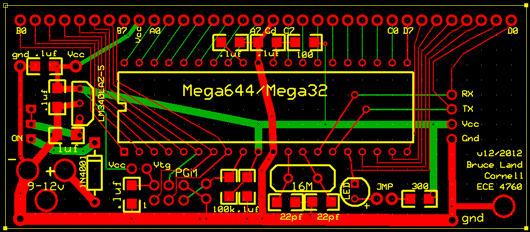
| $6.00 | Mega644 | Professor |
| $4.00 | PC Board | Professor |
| $2.00 | 9V Battery | Professor |
| $8.00 | LCD Display | Professor |
| $6.00 | Keypad | Professor |
| $1.62 | Piezo Buzzer | Digikey |
| $2.95 | Header Socket/Plugs (5c ea) | Digikey |
| $64.79 | Total |
Our goal was to keep the total parts under $75. We didn't have to scavenge anything to keep this goal.


Build Log How did you make this thing?
Hardware
First thing we did was buy the parts we needed. We used a few places to source the parts, with links to the shops in the Appendix section. When buying parts, we usually opted for the cheapest solution, as we did not feel we would need extra performance for this application.
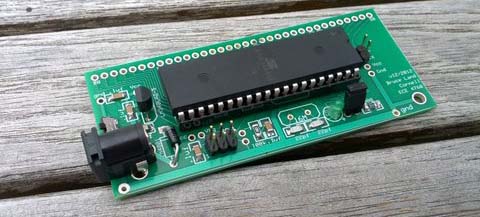
We assembled the PC Board with the Mega644 by careful soldering. We used the prototype board created by our professor detailed here.
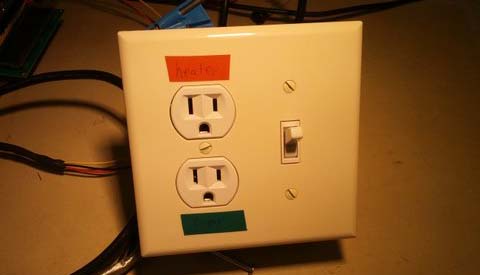
The most complicated module after the PC Board is the power module. We assembled the power module using the relay module, electrical box, electrical outlet, single pole switch and wall plate. We decided to use a plastic electrical box for safety reasons since it will not be mounted in a wall. We added the switch as a safety shut off. The relay operates off of 5V signals that are fed from the PC board into the box. The box also has a 110V input plug to connect to a wall socket. We are then able to plug the immersion heater and aquarium pump into the box and control them independently using the microcontroller.
One of the advantages of using a junction box as the power module is that we are able to change what kind of heater and pump we use. It is reasonable to change our heater to perhaps a hot pot that may heat up faster and have less losses (but able to cook less food).
We also assembled a board to wire the LCD, keypad and piezo to the PC Board. This gets mounted on the outside of the outside of the box to allow a user to interface with the cooker. Here it displays the temperature of the water inside, along with the target temperature and a timer. This can be set by using the keypad, and the piezo sounds an alarm when finished.
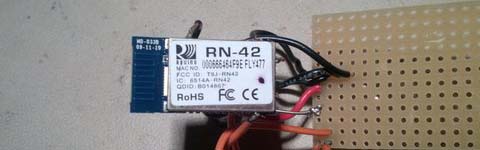
There was a board designed to house the Bluetooth module (an RN-42). This board had a LP2951 voltage regulator to shift the 5 volts from the Atmega644 to the 3.3 Volts required by the Bluetooth module. We connected the circuit as prescribed by the datasheet, but found that the output of the regulator varied too much. A project from last year, the pace clock project, used the same Bluetooth module and voltage regulator. They had the same issue we discovered and fixed it with a 10 micro-Farad capacitor. However, when we applied this fix, our regulator overheated and stopped working. By this point in the project, it was too late to obtain a new regulator, so we attempted to use a trimpot to control the voltage. Although the trimpot was able to control the voltage, too much current was sent to the Bluetooth module and it was rendered unusable.
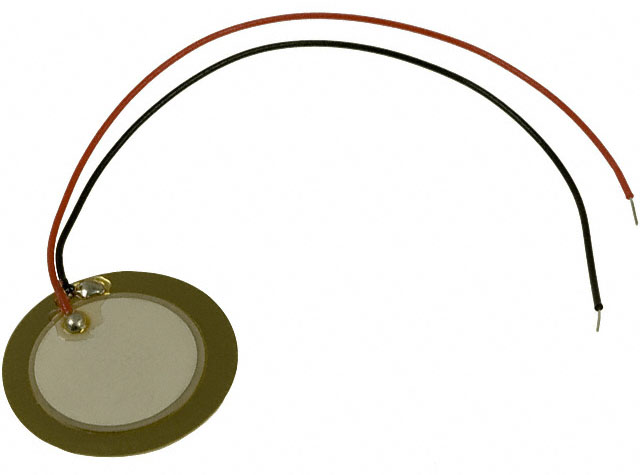
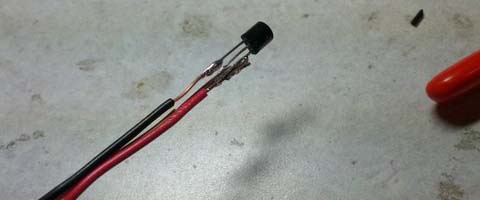
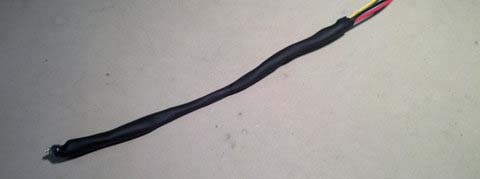
We use a IC temperature sensor to keep track of the water temperature in the box. The LM35 we use has a 0.5°C accuracy range to allow for precise temperature measurement. We waterproofed the temperature sensor by putting heat shrink around it and sealing it. We feel that the slight loss in conductivity from the heat shrink is acceptable when considering the specific heat and quantity of water. We placed the completed temperature probe in the box near the water pump to ensure that it is exposed to temperature differences relatively quickly.
Software
Our microcontroller of choice is the Atmel mega644, an 8-bit microcontroller. The project was coded in C. We use an embedded OS, Tiny Real Time, to manage the various tasks we need to accomplish.
Our code is organized into 4 tasks, PID control, getting input from the keypad, displaying the results, and turning on an alarm. The PID controller task determines how much power the heater should add to the system. Since the water heats so slowly and the circulator keeps the temperature uniform, the controller is effectively a proportional controller. The system has almost no overshoot, and no one location in the cooker will ever be significantly warmer than any other location. The PID controller runs about 50 times per second. When it executes, it first reads the value in the ADC high register. This is where the output from the LM-34 is sent. Since the LM-34's output voltage is directly proportional to the temperature, no additional manipulation is required to extract the temperature. Our PID algorithm is the same as we used in lab 4, only our parameters were different. Our final values were K_p = 9, T_i = 0.1, and T_d = 0.08. After performing the PID algorithm, the task signals the ADC to start another conversion.
The keypad task is used to read user input. This task is a modified version from the keypad code used in lab 3, except we now allow for floating point values and the ability to delete entries. After debouncing the signal using a debounce state machine, we determine what button was pressed. If the cooker is in "waiting for input" mode, the program stores the input in a buffer if it is numeric, the decimal point, or the backspace key, returns to the previous mode, if the cancel key is pressed, or commits the value in the buffer if the enter key is pressed. If the cooker is in "display mode" then this task witches mode if the appropriate button is pressed. This task handles debouncing by running every 30 milliseconds when a button is pressed and every 1 millisecond when there is no signal to debounce.
The display task for writing to the LCD refreshes the display every 100 milliseconds. If the program is in "display mode" the program reads and displays the current temperature. Otherwise, the program gets the input buffer and displays the contents of the buffer on the LCD.
The buzzer task simply enables or disables the TIMER1 interrupt whenever the user needs to be notified. This occurs when the water first reaches the desired temperature and when the calculated value for the food reaches the desired temperature.
The TIMER1 interrupt triggers every 1 kHz and toggles the voltage to a piezo-electric speaker, creating an alarm which notifies the user of significant events.
In addition to the microcontroller code, there is an Android application which can send commands over Bluetooth to the microcontroller. This application scans for available Bluetooth devices, prompts the user to pair with a device, and then allows the user to type in and send messages to the microcontroller. There is a limited UI since the Bluetooth module failed during the project. The Bluetooth connection is managed by Android SDK's BluetoothAdapter class. Determining what data to send and what to do when the data is received is the portion of the application that was written for this project.
This application used the Android SDK and is targeted for devices running API level 10 or higher. The Android OS is open source and available from .
Documentation How do I use this thing?
Successful use of our cooker requires strict adherence to the following procedures.
Before turning the heater on, make sure the cooker is filled with water such that the temperature probe, heater, and pump are completely submerged in liquid and that the top of the cooker is secured in place.
The heater should be plugged into the heater plug, and the pump into the pump plug. otherwise the heater will constantly be on and you run the risk of overcooking the food and damaging the temperature sensor. Additionally switching the pump on and off can induce stress which degrades its performance. Thus you should ensure that the heater is plugged into the heater plug and the pump into the pump plug.
Do not add food to the cooker unless the water is already heated to the desired temperature. If the food is added prematurely then the calculations used to determine the temperature of the food will not be accurate and a minimum temperature cannot be guaranteed.
To start the cooker simply flip the switch on the power box to the on position. The default temperature for both water and food is 100 degrees Fahrenheit. The default initial temperature is 77 degrees Fahrenheit. The default thermal diffusivity is 1. These settings can be changed using the keypad interface.
To enter display mode from any input mode:
- press 'A' on the keypad to discard your input
- press 'D' on the keypad to enter your input
To change the desired temperature of the water:
- Enter Display Mode
- Press 'A' on the keypad
- Enter your new desired temperature
- Press 'D' to save the new temperature OR Press 'A' to return to display mode (and ignore the current input)
To change the desired temperature of the food:
- Enter Display Mode
- Press 'B' on the keypad
- Enter your new desired temperature
- Press 'D' to save the new temperature OR Press 'A' to return to display mode (and ignore the current input)
To set the initial temperature of the food:
- Enter Display Mode
- Press 'C' on the keypad
- Enter the initial temperature
- Press 'D' to save the new temperature OR Press 'A' to return to display mode (and ignore the current input)
To set the thermal diffusivity of the food
- Enter Display Mode
- Press 'C' on the keypad
- Enter the thermal diffusivity
- Press 'D' to save the new temperature OR Press 'A' to return to display mode (and ignore the current input)
In input mode the '*' key lets you input a '.' character (decimal point) and the '#' serves as a backspace key.
To conserve energy, remove food from the cooker as soon as possible and turn the switch on the power box to the off setting.
Results / Conclusions How does it perform?
We feel that we have achieved our goal of making a usable sous-vide cooker. The cooker has an accuracy of about 1°F which is perfectly suitable for cooking food. We tested the cooker up to 150°F at an extended period of time, which is the appropriate temperature for medium-well steak. We ensured safety in the high voltage components by using an insulated junction box with all the high voltage components, along with a shut off switch. There should be no interference with other people and it should be easily usable through the keypad interface.
Task Breakup
Harrison Wong worked on hardware design and setup. He also worked on the website layout, setup and pictures.
David Diner worked on software for the AVR and the Android bluetooth app.
Together we both worked on debugging the software, writing up the website and keeping on track.
Further Extensions
We hoped to add a water level sensor to measure the volume of the food being added to the cooker. Unfortunately, the sensor didn't arrive in time for our project, so we were unable to use it in the project. The ultrasonic ranging sensor would have been used to measure the volume of water and the volume of the food to determine the heating speed of the food.
We could also package our hardware better such as making a waterproof box to house the electronics in.
Ethical Considerations
We refer to the IEEE Code of Ethics.
We made sure to make our project as safe as possible by using an enclosing insulated electrical box for high voltage components. We make sure to clearly label where the plugs are, and have clear documentation concerning this.
We do not anticipate any conflicts of interest, patent considerations, or other intellectual property to have any considerations on our design, as our idea is well founded in existing literature.
Our claims are honest in their work, and respresent a real formulation of our data. We do not aim to misrepresent any claims that we have made.
We appreciate any criticism of our work, and are always welcome to improvements to it. For this, we haver released our source code as open source to allow further improvements to be made to it if wanted and to allow further advancement to be made.
We have made our project as accessable as possible within normal means, and we feel that it should be useful to anyone capable of cooking food normally.