 When the alarm powers up, the time and date will have to be set.
The alarm clock is very user friendly, with 5 main functional buttons. This guide will take you through the basic operation of the alarm clock.
When the alarm powers up, the time and date will have to be set.
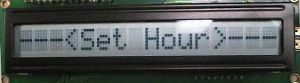 When the set hour prompt appears, press "#" to advance the hour and "*" to move back an hour. The time will appear on the LED display. Press "D" when finished.
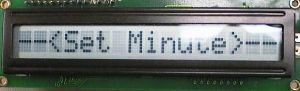 When the set minutes prompt appears, press "#" to advance the minute and "*" to move back a minute. Press "D" when finished.
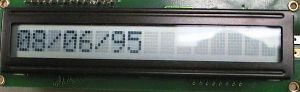
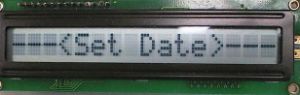 When the set date prompt appears, press "#" to advance the month and "*" to move back a month. Press "D" to set the day, using the "#" and "*" again for changing the day. Press "D" to set the year and set it with the "#" and "*". When "D" is pressed again, the clock will resume normal operation, with the date display on the LCD and the time displayed on the LED display.

 A green LED indicates that the clock is running by turning on every other second and being off in between. It is located immediately to the left of the LED display.
 To set the alarm, press the "C" button. Press "#" and "*" to adjust the hours and the press "D". Now, adjust the minutes. Press "D" again to resume normal operation. The alarm is now set, as indicated by the word "*ALARM*" printed on the LCD.
 To unset the alarm, merely press the "A" key and it will be toggled off. The word "*ALARM*" will disappear, indicating that the alarm has been disabled.
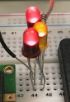 When the alarm goes off, three LEDs will light up, a loud sound will emit from the speaker, and the second counting LED will stay on. After 5 seconds, the alarm will stop going off and normal operation will resume. If the alarm is not toggled off, it will ring at the same time the next day so you do not need to reset it.

