Introduction
Design
Hardware
Results
Appendix 1
Appendix_2
Appendix 2
Schematics
printer friendly version
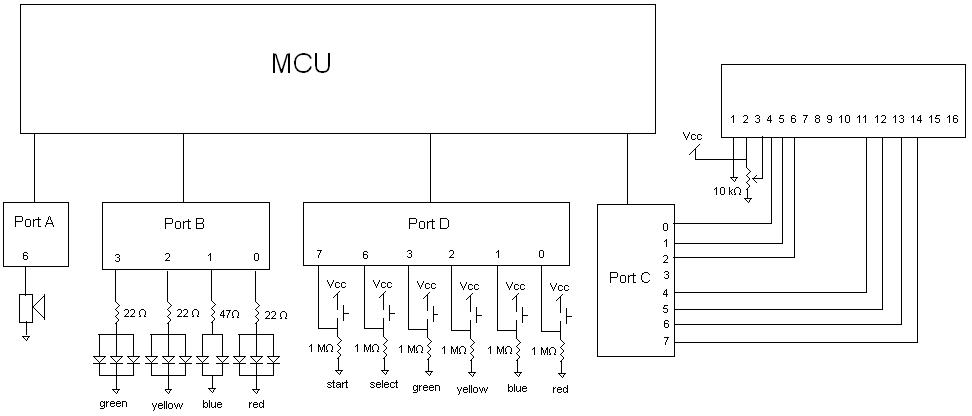
Here is the schematic we used to design the Simon device
Fig 3
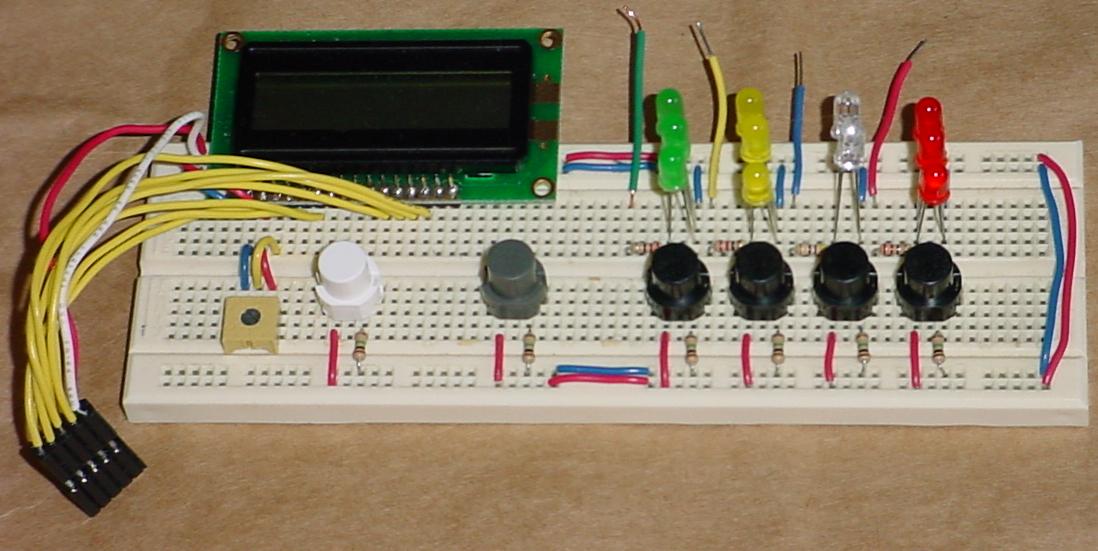
A picture of the physical device
Fig 4